The One Ring http://test.one-ring.co.uk/ |
|
my first terrain piece http://test.one-ring.co.uk/viewtopic.php?f=7&t=29197 |
Page 1 of 1 |
Author: | fergus [ Sat Aug 02, 2014 9:58 am ] |
Post subject: | my first terrain piece |
Hey guys I'm completely new to terrain modelling ( don't know a thinghttp://one-ring.co.uk/posting.php?mode=post&f=7# ) and was wondering if you guys could help get me started e.g what i should build for my first project, tips & videos, tools, e.t.c would be a great help |
Author: | Xintao [ Sat Aug 02, 2014 5:03 pm ] |
Post subject: | Re: my first terrain piece |
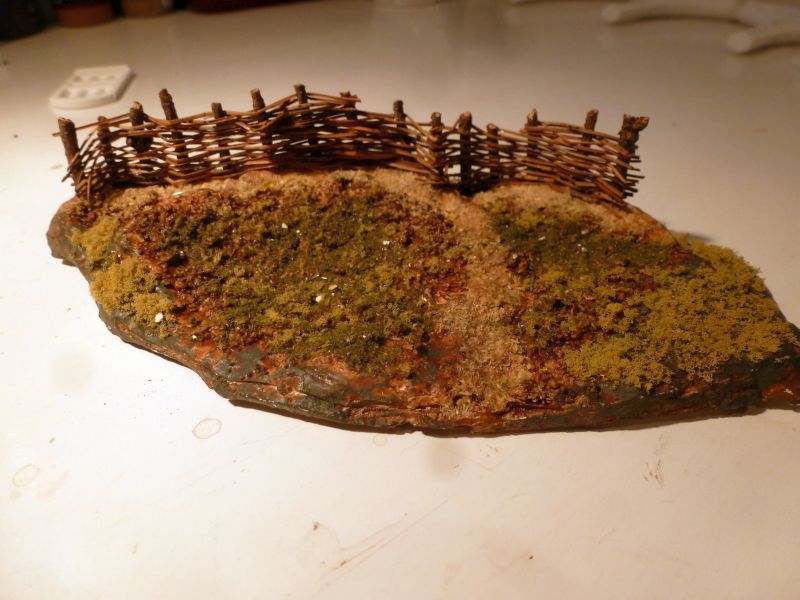
Welcome to the hobby. Your question is pretty broad, specific questions like "how to model crates and barrels" would get a quicker response. Well with no knowledge of what terrain you might have or even figures, it is hard to say. I think the figures you have and the opponents you might face have an impact on what you build. For Example, if you had Wood Elves, I would start building up a lot of trees. If you had Haradrim you'd want some desert themed pieces. But lets start with the basics: Playing surface, game matt or battle board Trees or bushes Hills or rocky outcroppings Water features Houses or buildings Fences, crates, barrels, etc These are the basics to aim for, to get you on the road to a good looking table. I'd pick one of these and concentrate on it till you completed it. All of it can be made by you, but sometimes it's just better to purchase an item already made. I build lots of terrain, but I buy Woodland Scenic Trees. Eventually Again, assuming you have none of the above. Start with a playing surface. Cheap and easy, get a 3x3 piece of green or brown felt and your done. Next step up in difficulty, get a 3x3 piece of plywood and some green grass flocking. Paint it green and dump the flock on the WET paint. Really dump it on thick. Press it down into the paint then let dry. After it's dry, shake off excess onto a newspaper to save it for later. Use a white glue spray(woodland scenics makes some) to seal in the flock and fix any patches that didn't hold the flock. Let dry and play. That's a start, good luck. |
Author: | fergus [ Sat Aug 02, 2014 7:25 pm ] |
Post subject: | Re: my first terrain piece |
Thanks for the reply My main miniatures include uruk-hai (building an army for them ) and goblins But I do also have a few (1/2 boxes ) orcs, gondorian warriors, elves , Rohan warriors +riders Instead of making a board straight of I was thinking about a piece of terrain like "making a standing rock" but you know best |
Author: | Creaky [ Sat Aug 02, 2014 9:12 pm ] |
Post subject: | Re: my first terrain piece |
One thing which is fairly simple for beginners is a pond. A bit of thick card, some woodfiller around the edges to make the bank, then paint and flock. It's a good practice till you get more experienced, and want to try stuff like water effects, etc. On the table it's pretty cool, too, and several of them can make for some nice marshland if you put some bristles into the 'water' for reeds. Alternatively, if you'd like to expand your set quickly but with less effort, there are loads of free paper terrain pdfs on the net (and plenty of paid for ones, too). Print out some buildings, stick it to card and cut and fold it to shape. It's rather effective. The important thing is not to over-face yourself - I know my first terrain project was "Ima build a watchtower!" But it ended up as... Well... I buy my terrain ready made most of the time now, because god help me that was a display of incompetence that would make any politician envious. |
Author: | Mapper [ Sat Aug 02, 2014 11:39 pm ] |
Post subject: | Re: my first terrain piece |
Terrain can be as simple or complicated as you want. This is a woodland scenics rock mold made with plaster of paris, some sticks, pine needles and some woodland scenics ground cover. A good starter kit from them: http://woodlandscenics.woodlandscenics. ... 954/page/1 Rock formations can also be made from landscaping bark. Walk around at your local park and look down at the fallen sticks, gravel, etc., you will be amazed what you can use. |
Author: | fergus [ Sun Aug 03, 2014 8:27 am ] |
Post subject: | Re: my first terrain piece |
Sorry creaky but what is woodfiller (as I've said don't know a thing I have seen the woodland scenics video on water effects and thought it was pretty cool so might go ahead and try a pond Mapper with the mould you just fill it with plaster of Paris right |
Author: | fergus [ Sun Aug 03, 2014 8:34 am ] |
Post subject: | Re: my first terrain piece |
Sorry creaky but what is woodfiller I saw the wood land scenics water effects video and thought it was quite cool So might try that Mapper you just filled the mould with plaster of Paris After That what did you do , paint it and then add flock? ... |
Author: | mertaal [ Sun Aug 03, 2014 1:11 pm ] |
Post subject: | Re: my first terrain piece |
If you're just starting out in the game then you want something that'll be useful, right? A gaming surface is all well and good, but makes for pretty boring games without anything to vary your battles. For now I'd use a green sheet or a flock mat as a surface, and worry about terrain first. I would suggest making three of... something. Hills or rocky outcrops are an old favourite. Forests too, but then you'll need to buy some trees (you can make trees, but I'd build a few terrain pieces first as it's not a simple thing to do. Hills can be made from insulation foam, available at the local builder's merchant. Rocky outcrops are even simpler- find yourself some big chunks of gnarly tree bark, cork or even actual rocks (although the weight can be a problem. you can place those straight on to the battlefield as they are, just to play with, but it's more fun to make something a bit more interesting by painting and basing it. So you need some sort of basing material. At a pinch you can use thick (not corrugated) cardboard, but this warps when glue dries. Better would be some foamed PVC or foam core (available at the art shop). If you're a bit more handy, use MDF. Or you could use trusty old (yes OLD) CD's, although then you're limited in size. Optional extra: Buy yourself some Milliput or if you have some sort of filler or builders putty that will work too. vary the flat surface of your basing material with the putty/filler and make it look more like natural terrain. Then spread the whole thing in PVA glue, and add your "rock". Cover the entire thing in sand and wait for it to dry. Then, paint the damned thing of course! |
Author: | Oldman Willow [ Sun Aug 03, 2014 3:03 pm ] |
Post subject: | Re: my first terrain piece |
I have been building terrain for 40 years. You will need to start gradually and build up a collection. Basic advice. Start with a table cover. Everything else will look better on nice ground cover. Start simple. Go to the fabric store and purchase a yard of felt. Green or tan/brown. Get two colors. The contrasting color will be used to make area terrain markers. Buy some fabric glue. Stop by a dollar store and pick up a bag of polished stones and a bag of Reindeer moss.Dollar Tree also has some other types of moss that might be useful. You can use the Spanish moss for everything from trees to doll hair. In the old days people would suggest that you place books under the table cover for hills. Use cardboard cut into shape to start. The reindeer moss and polished stone will be used with the felt area markers for difficult terrain and will form the basic material for more themed projects later. Some links Trees https://www.youtube.com/watch?v=r5jPBzbpP4U https://www.youtube.com/watch?v=ClCwvzT2VG4 https://www.youtube.com/watch?v=mDTKZegWuf4 https://www.youtube.com/watch?v=nO4Y1r98X6g Hills/foam https://www.youtube.com/watch?v=qM0vLhZB5QM Joel Logan likes to use cat litter for flocking. I do not recommend it because it generally made from clay. It will not hold up.You can also use a bread knife to cut foam. Card board crafts DM Scotty has 300+ this is #1 -Tools start at about 6 minutes. https://www.youtube.com/watch?v=B4a4m_F ... 2114248595 There are tons more. Some of my trees Hirst Arts Project |
Author: | Mapper [ Mon Aug 04, 2014 12:36 am ] |
Post subject: | Re: my first terrain piece |
Fergus, yes filled the mold with plaster of Paris, once out of the mold painted it and flocked it. One problem with plaster of Paris is that it does chips so you either dye the plaster when you mix it or be prepared to touch it up periodically. My feeling is if it gets too bad I just make another, I don't feel like I'm out too much if I do and since I like making terrain, it gives me a chance to try something new. |
Author: | fergus [ Mon Aug 04, 2014 12:23 pm ] |
Post subject: | Re: my first terrain piece |
Thanks all |
Author: | Sticky Fingersss [ Tue Aug 05, 2014 10:44 pm ] |
Post subject: | Re: my first terrain piece |
I am always happy for Oldman Willow's detailed and visual responses! |
Page 1 of 1 | All times are UTC |
Powered by phpBB © 2000, 2002, 2005, 2007 phpBB Group http://www.phpbb.com/ |